|
|
|
|
|
|
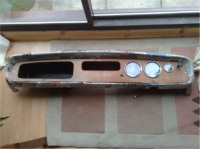
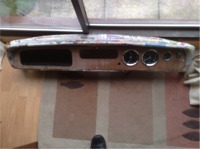
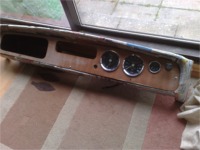
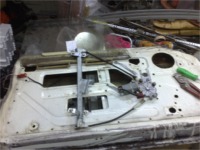
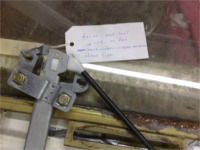
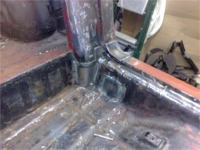
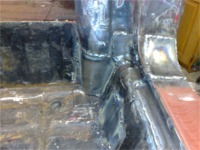
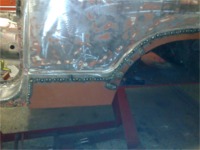
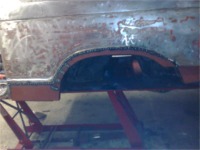
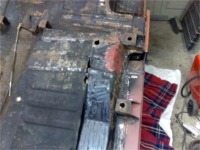
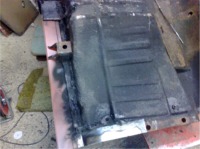
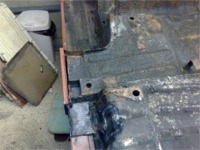
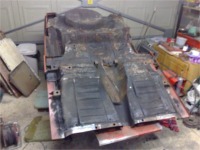
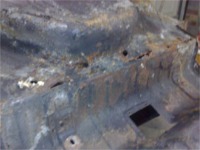
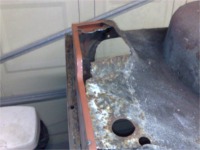
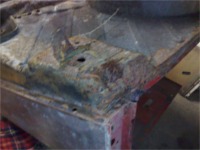
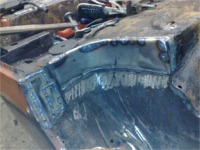
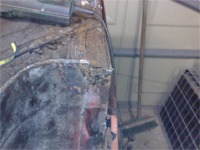
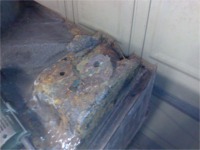
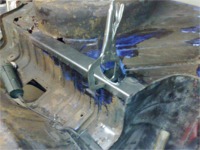
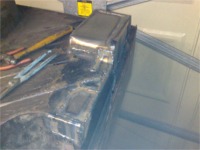
24 March 2008 - The Underside The nice thing about the Easter break is the long weekend! The dashboard came out quite well considering, and Ireckon that a good coating of waterproof paint and a covering of sponge and vinyl, it will be almost as good as new. As you can see by the first few pictures, the guages cleaned up well and I have stripped the dashboard ready for the new burr walnut veneer that I got hold of. The only problem now is that I have to learn how to french polish as unbeknown to me the new veneer is in its raw state, ie dull and unpolished. Apparently you have to stick it on, trim to fit and then french polish it all over to give it the shine. That will be a job when it goes off to the paint shop I reckon! Another new addition is electric window motors. I know, the purists will say that it is not original and they are completely right, but actually I and doing all the work and I will have it the way I want it! Well infact it is the way 'she' wants it! I did draw the line at a power hood though! I managed to get some Volvo 440 electric motors and with some modifications I got them to fit quite nicely. The proof of course will be whether they go up and down when all the trims and channels are in. The reason I am worrying about this at this early stage is that I knew that there would be a bit of modification work on the doors and I did not want to do this when it comes back from the paint shop! After welding the passenger side wing and quarter panel, I managed to turn the tub over to get easy access to the bottom. This is obviously something you can never do when the car is on the road, so it makes sense that while I have got it off the chassis I may as well do all that I can. It will save a lot of future work I hope and it ultimately make a much neater job. I am hoping that with a good coating of cavity wax after it is painted, that I will not have to do any welding for MOT's for a number of years. The underside is pretty bad, and I am sure it is in all the normal places. Well if I had done another one, I am sure I would have found it rusty it all the same places! I have done some tidying up under the sills where I have fitted replacements but the majority or rot is around the rear end and the boot floor. It is now starting to resemble a patchwork quilt, with all the repairs that I am having to do. It looked quite daunting when I first turned over the tub, but when you have cut away the rot and started to patch up, it is surprisingly easy and if you follow the way the original panels fitted together, then it is just a case of rebuilding it piece by piece. I am trying to seam weld all the panels, with the exception of the wing repairs and quarter panels which are spotted. The reason for this is reduce the amount of warpage in the panels. If you have a damp rag handy and don't weld close together, but move along the panel and then back to the beginning, you can keep the panel pretty straight. Anoth tip is to make the panel as best you can and then spot weld it into position. Using a hammer, as you spot weld, form it into a rough shape to fit. As you seam weld around the repair plate, you can use a hammer and maybe a blunt chisel to form the panel into shape. It is a lot easier when you have heated the panel by welding as the metal forms better. This is good for curved panels and as you can see you can get a reasonable job from this method. Bear in mind that all I am using is a 100 Amp Mig hobby welder and small bottles of gas. In hindsight I should have got a big gas bottle and new regulator, but I don't have that much more welding to go, so I will make do with the small ones for now. I am hoping to get the tub welded by the end of this weekend, well that is my plan, and then I can start on the chassis. The chassis shouldn't take too long as it is only mechanics and I have a lot of new parts to fit. The only delay I reckon will be where I don't have the parts or I have to stop and paint stuff.
|
|
||||||||||||||||||||||||||||||||
|